New Request
Create a new self-service provisioning request using a predefined template.
When you click on New Request in the menu, the following screen opens:
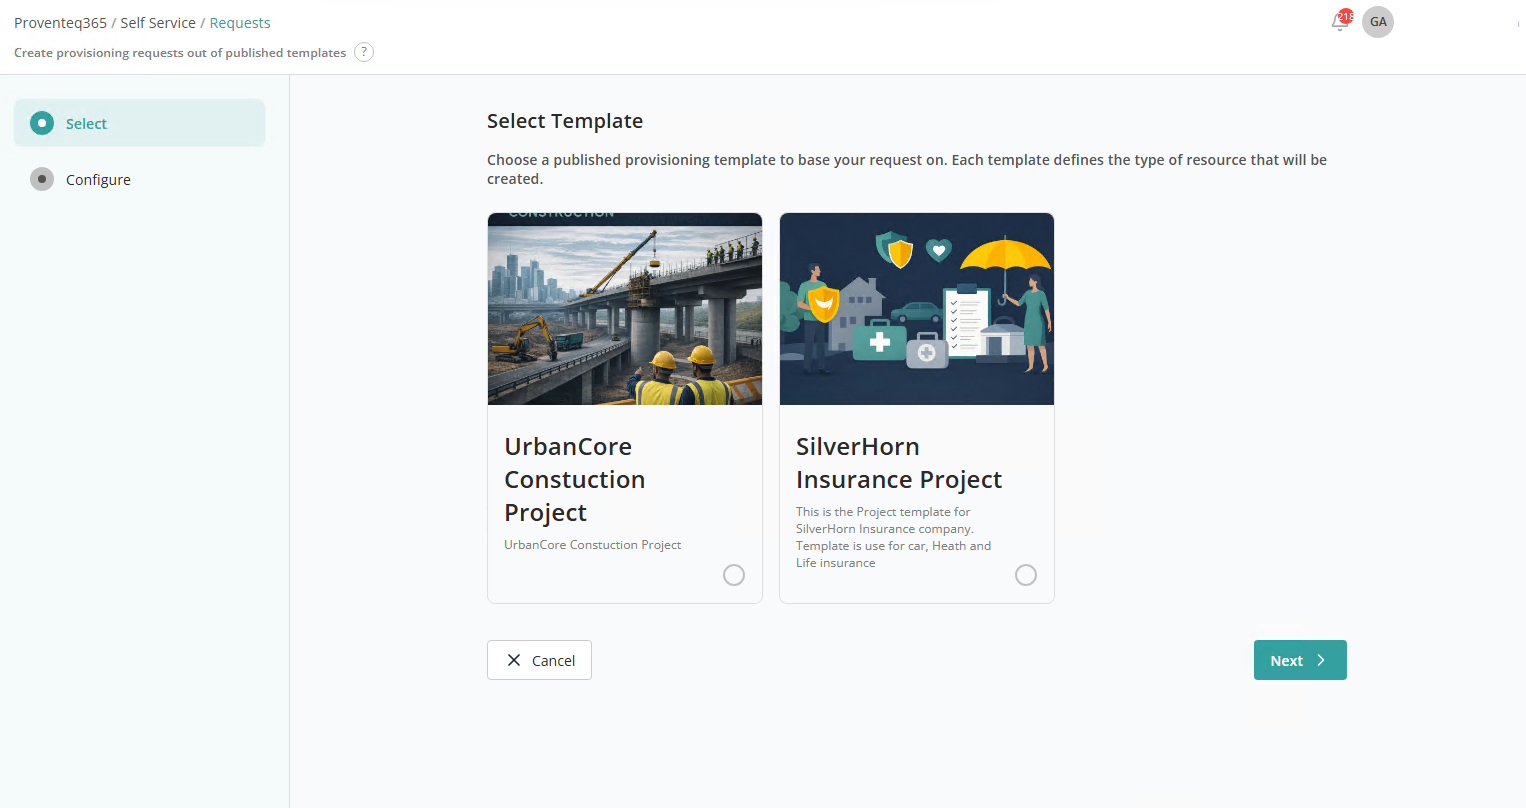
Select Template
The Select Template screen is the first step in creating a self-service provisioning request. It allows you to choose a predefined template.
Multiple template cards are displayed on the screen. Each card includes:
- Template Image
- Template Name with description
Select the relevant template and click Next to move on to the Configuration step.
Configuration
The Configure Request screen is the second step in the self-service provisioning workflow. It lets you define request details and provide required user input values based on the selected template to create a new resource.
At the top of the screen, the selected template is displayed.
Below the template name:
- Request Name — Enter a unique name for your provisioning request. This helps identify and track the request in the system.
- User Inputs Section — Contains the list of user inputs added to the template. Each row includes:
- Name — The field label.
- Type — The type of input (e.g. text, user selection).
- Value — The value you need to provide.
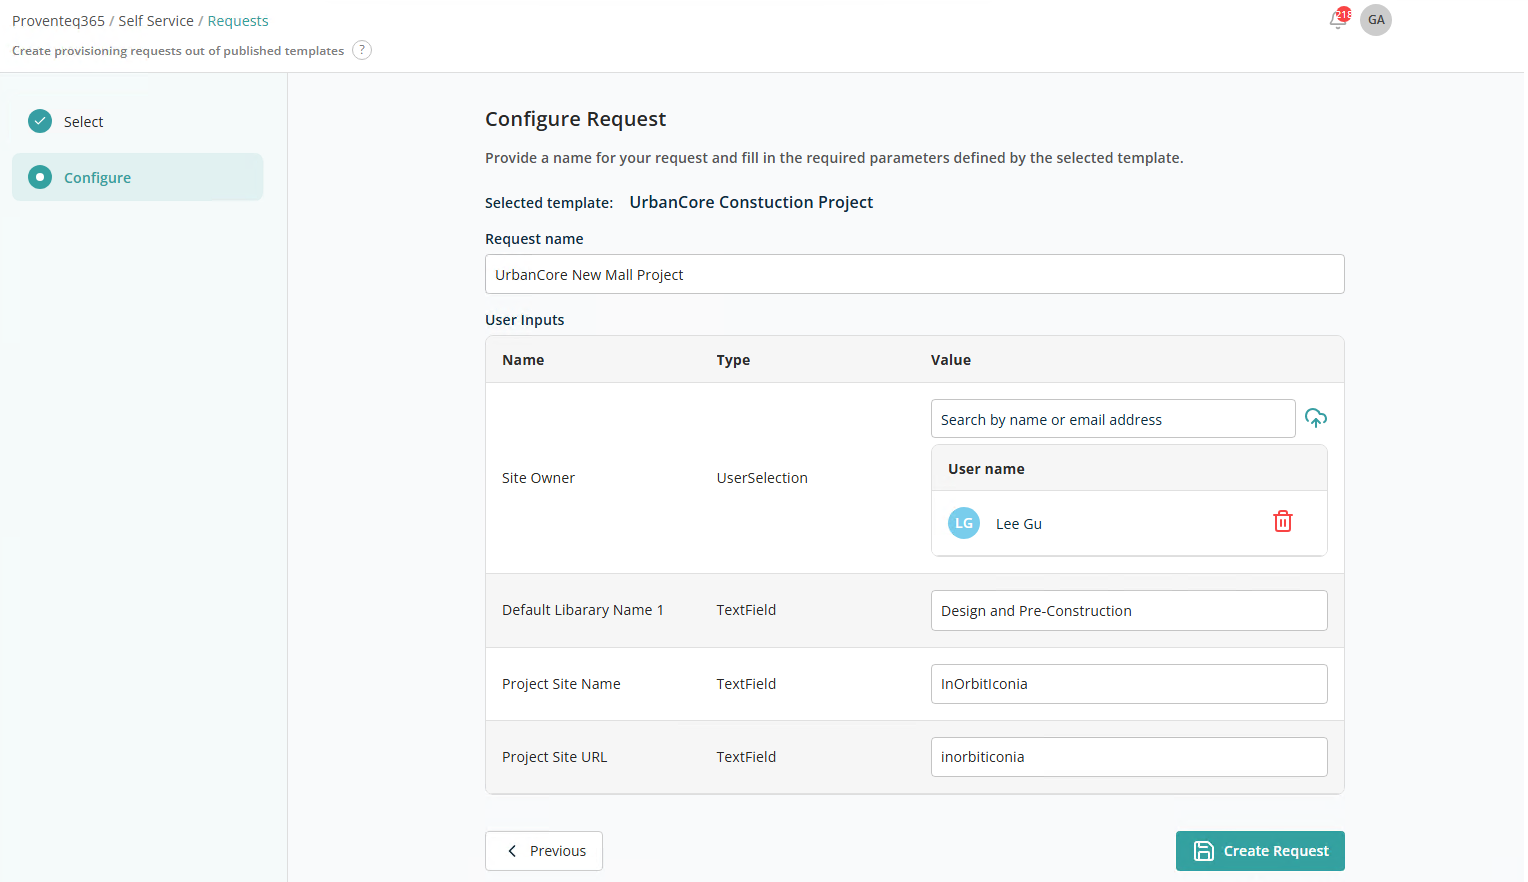
After entering all details and user input values, click Create Request. Once the request is created, you can track its status on the Request History screen.
Note: If the template was created with the Require Approval setting, after the provisioning request is created it appears in the Approvals module. If the template was created without Require Approval, the request appears directly in Request History.